[Cracking Windows Kernel with HEVD] Chapter 0: Where do I start?
Cracking HackSys Extreme Vulnerable Driver: where do I start?
What is this?
Hello! Previously we exploited vulnerable linux driver by invictus-0x90. If you missed, not to worry: this series is totally unrelated, since we’ll be exploiting the vulnerable Windows driver HEVD. However, if you are a curious one, make sure to check the other post!
Today we’ll be attacking HEVD: HackSys Extreme Vulnerable Driver. This Windows driver is intentionally vulnerable to many memory corruption vulnerabilities (stack overflow, int overflow, use after free, type confusion, to name a few). We will exploit stack overflow to gain elevation of privileges in this post.
This exercise is a “must do” if you are starting on Windows kernel exploitation. I would like to thank Payatu and HackSys for developing this extremely useful learning tool.
Many people over the Internet have already solved it and posted writeups (probably way better than mine). However, most writeups I have read lack details on bypassing SMEP and KPTI. This part will be explained in depth here. Another rare, if not unique, feature of this post will be our sysret approach with KPTI.
I warn you this post will be long and slow-paced, good for people who has experience with memory corruption vulnerabilities but are getting started in kernel hacking. It will also go in depth on advanced topics, such as kernel security mitigation bypasses, KPTI bypass and sysret. I have divided in 5 chapters to be released every other week:
- Chapter 0: Where do I start?
- Chapter 1: Will this driver ever crash?
- Chapter 2: Is there a way to bypass kASLR, SMEP and KVA Shadow?
- Chapter 3: Can we rop our way into triggering our shellcode?
- Chapter 4: How do we write a shellcode to elevate privileges and gracefully return to userland?
Before we move on, I would like to thank a few friends, as I have not solved challenge by myself. Instead, it was an effort by me and my friends Viniboy, Giuliano and Psylinux through extensive Jitsi calls, a few frustration moments and a lot of joy at the end! Although we had some experience in Windows userland exploitation and Linux kernel exploitation, we did not know anything on Windows kernel exploitation. It has been quite a journey!
Finally, I would also like to send my appreciation to SiDi, my employer, for giving us the time and resources to study this topic.
Now let’s get started.
Setting up the environment
The environment setup is a little tricky. For some reason unknown to me (if you know why this happens, please send me an email), VirtualBox does not have SMEP support (if you don’t know what SMEP is, just ignore the last sentence! I will go in depth about SMEP throughout this blog post, but for now just know it is a memory protection). Without SMEP, we miss half the fun. I recommend the latest Hyper-V or VMWare for this, since both support this protection. I will be using Hyper-V in this post, since it has a better performance for kernel debugging. Be advised that VMWare will most certainly have performance issues when debugging Windows kernel.
First, download Windows 10 for Hyper-V or VMWare from the official Microsoft website. You should also have a Windows host. If you don’t have a Windows host, you can virtualize it aswell.
The setup we’ll organize here is basically this:
┌───────────────────────────┐
│                           │
│                           │
│Windows 10 host (Debugger) │
│                           │
│                           │
└─────────────▲─────────────┘
              │
  Attached to debugger on
              │
              │
┌─────────────┴─────────────┐
│                           │
│                           │
│  Windows 10 VM (Debuggee) │
│                           │
│                           │
└───────────────────────────┘
We have a Windows 10 VM (the one we just downloaded) which kernel we will attach to WinDbg debugger on our host. Pretty simple!
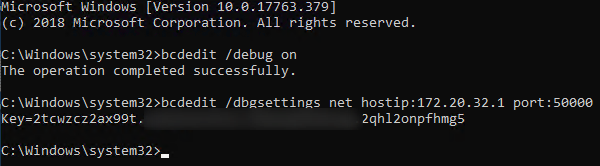
Once you have downloaded the Windows VM, start it up on VMWare or Hyper-V. Open cmd as administrator and put the following:
bcdedit /debug on
bcdedit /dbgsettings net hostip:<HOST IP ADDR HERE> port:50000
A key will be given. Copy this key to your host.
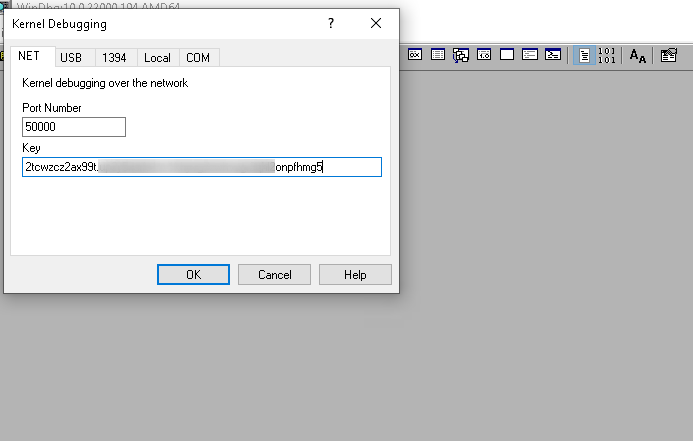
We should be able to attach a debugger now using this given key. Download Windows SDK from the official Microsoft site to your host. We’ll use Microsoft’s debugger WinDbg, which comes in this SDK.
Open WinDbg on your host, go to file -> kernel debugging. Leave the port number as 50000 and paste the key you copied from your guest (debuggee). Hit OK and reboot your guest.
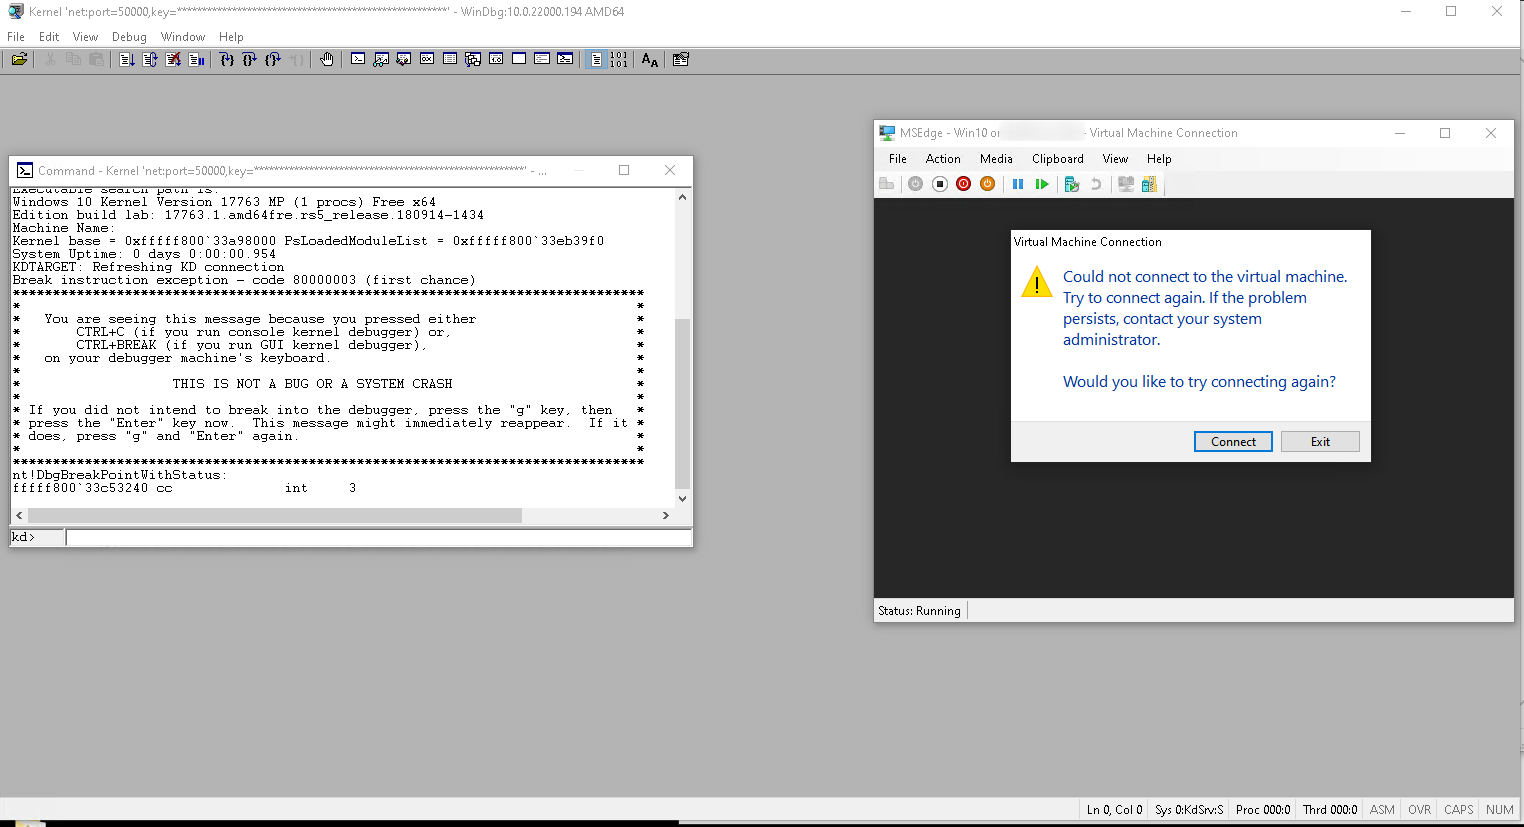
Once you have rebooted your VM, it should have been attached to the debugger. We will pause the execution to make sure everything is allright. If you are on Hyper-V on advanced mode, it will drop your connection until you restore execution (by pressing F5 on WinDbg).
I don’t want to install Visual Studio in the debuggee machine, so I will create a shared folder between my host and VM to pass the exploit binary which I’ll be building from my host machine. In addition, HEVD will also be sent through this shared folder. The way shared folders are created depend on whether you use VMWare or Hyper-V, so I’ll ommit this part here.
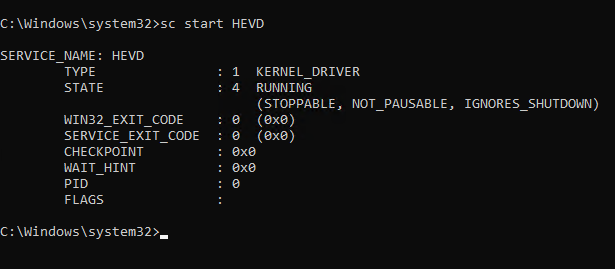
Download HEVD to the debuggee machine and load it. This can be done by opening the command prompt as Administrator and executing the following:
sc create HEVD binPath= <Path to HEVD root folder>\driver\vulnerable\x64\HEVD.sys type= kernel
sc start HEVD
If a debugger is not attached, it will prompt an error on starting the service, as follows:
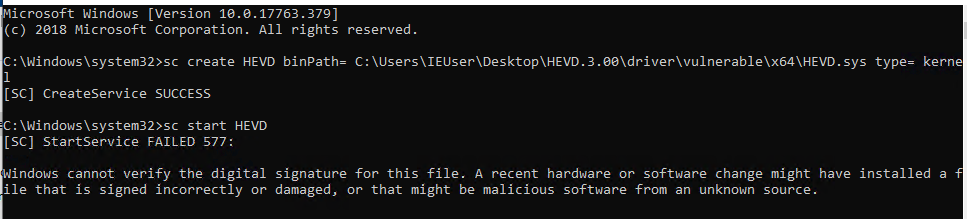
If that happens, just attach the debugger and run it again:
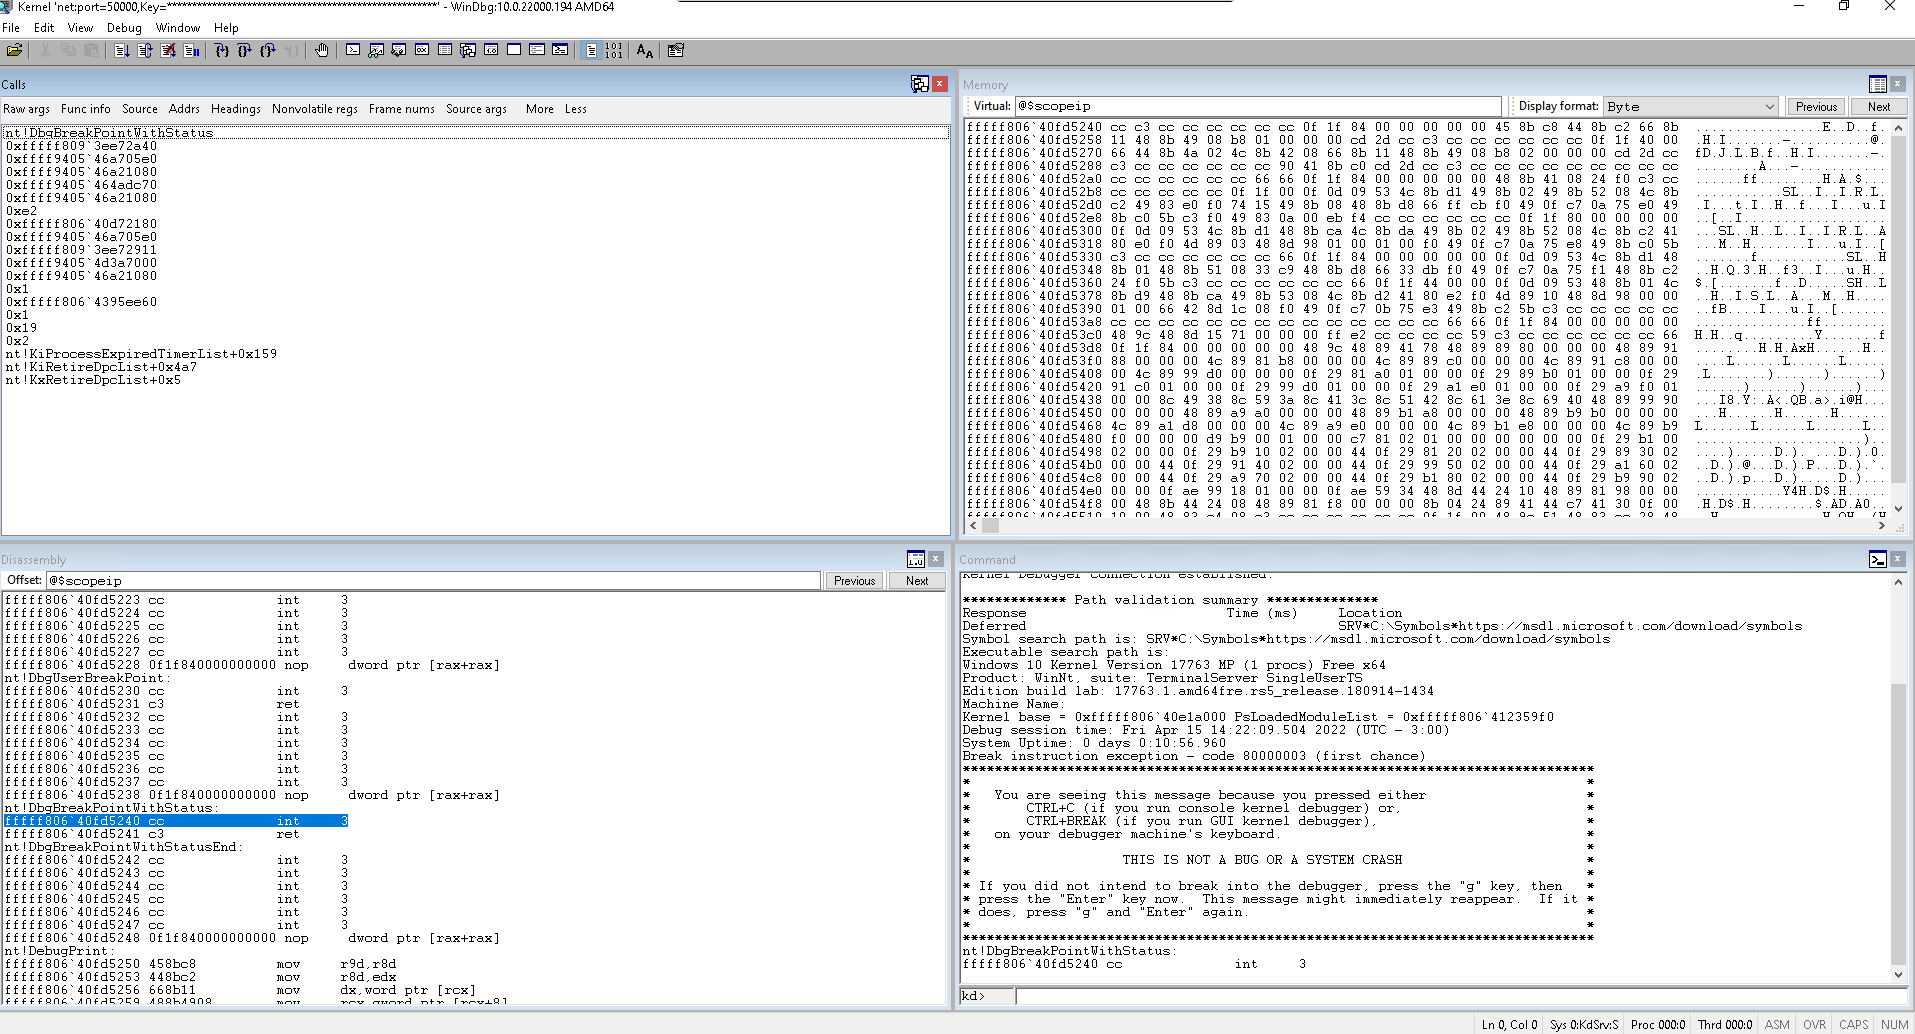
We are almost all set at this to start writing the exploit. But first, let’s tune up WinDbg. If you open it vanilla, it will be ugly and will show only the command line. On WinDbg go to view and enable Memory, Call Stack, Disassembly and Memory. Organize it as you wish. Mine looks like this:
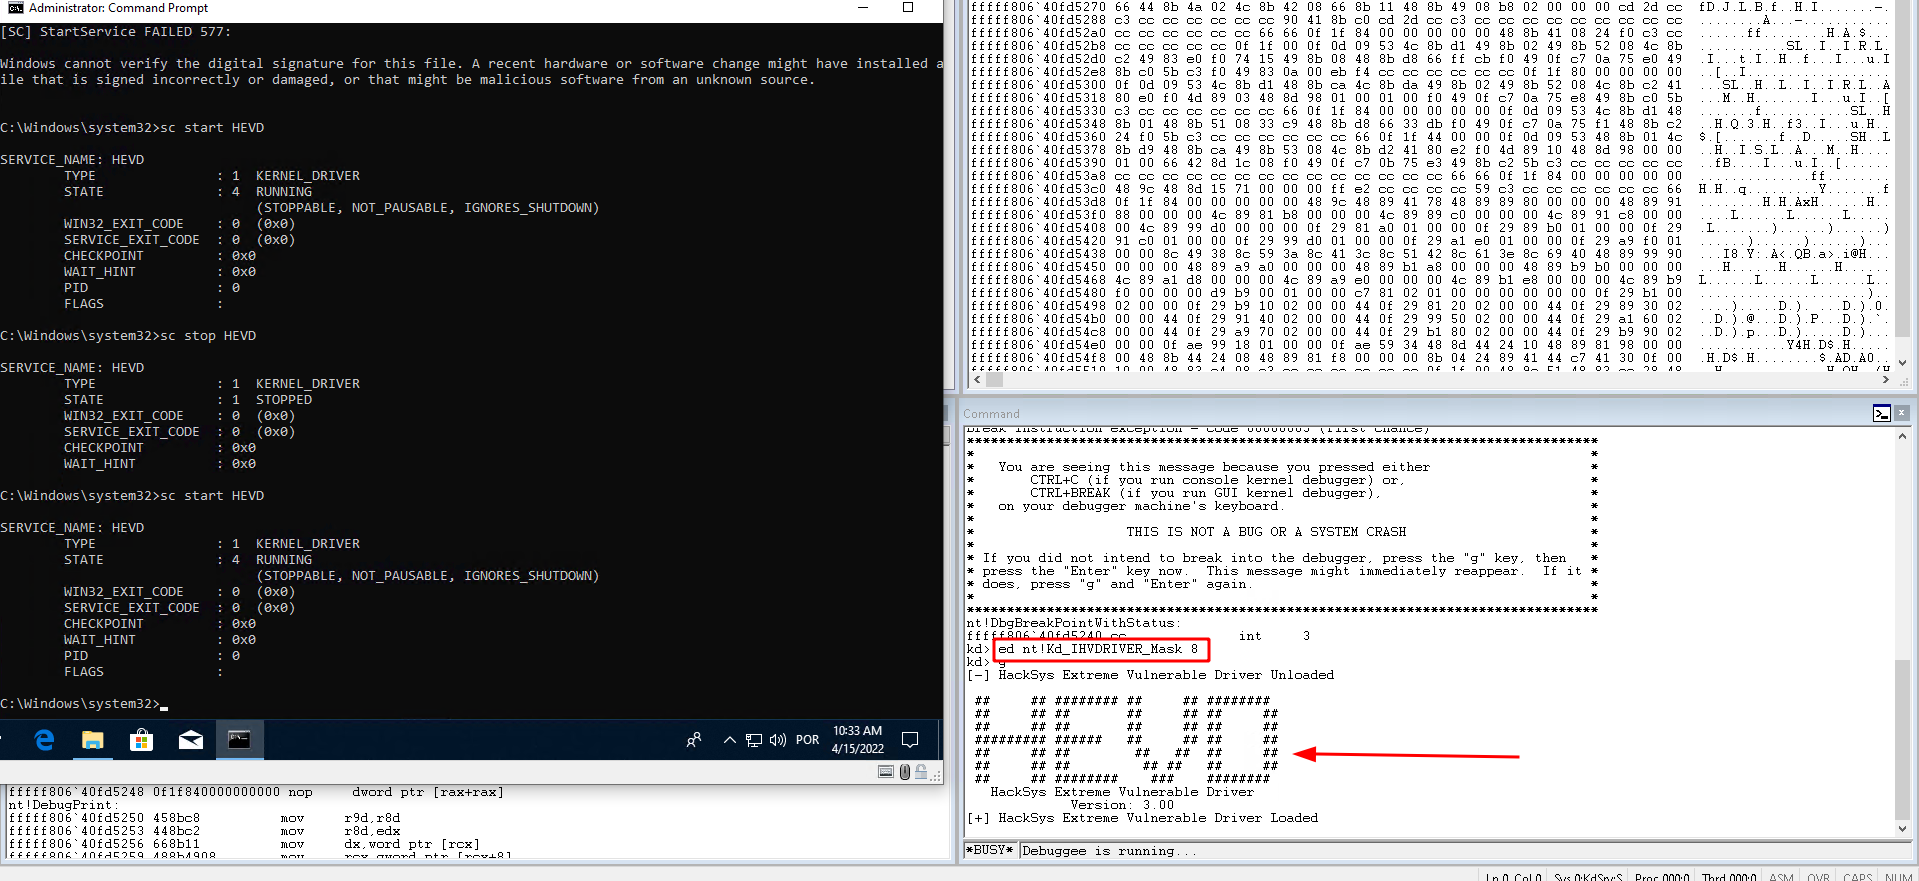
Finally, we’ll enable DbgPrint messages on WinDbg by pausing and inputing the following command:
ed nt!Kd_IHVDRIVER_Mask 8
To validate that it works, stop and start HEVD. If you see the debug messages, everything is all set!
The environment is done! You may now debug your kernel. Try out a few experiments! Pause it. Put breakpoints. The sky is the limit.
On the next part we will analyze the vulnerable driver and start exploiting it. See you then!!